 README
README
Brother Cert
Brother Cert is a command line tool to automatically install an ssl certificate on a brother printer.
Compatibility Notice
The tool was built specifically for the Brother MFC-L2710DW, and MFC-L2750DW printers. It seems reasonable other Brother printers probably use the same mechanisms but your mileage may vary.
It may be easiest to manually perform the initial configuration of SSL on the printer before attempting to use this tool for subsequent updates. However, this is not required. The only required manual step is to install the root CA for the certificates you plan to use.
Usage
The tool will:
- Connect to the printer,
- Convert the pem files into p12 format,
- Upload the p12 to the printer,
- Activate https using the new certificate,
- Restart the printer, and
- Delete the previously active certificate.
Run the tool as:
./brother-cert --hostname printer.example.com --password secret --keyfile key.pem --certfile cert.pem [FLAGS]
Help can be viewed with:
./brother-cert --help
Initial SSL Setup
It is likely easiest to perform the initial setup of SSL on the printer manually, prior to using this tool to manage the certificate(s) moving forward. However, it is not required. The only required manual step is uploading the root CA (step #1) and setting the TLS version (optional step #5).
- On the printer Web UI, login and navigate to
Network > Security > CA Certificateand upload the root certificate PEM file corresponding to the certificates you will use. (Upload the root only, intermediate certificates should not be included in this step.) - Create an RSA (NOT ECDSA) private key and corresponding certificate. A bit size of 2,048 is recommended as the printer has limited space to store certificates.
[!IMPORTANT] WARNING: If your certificate does not have a Common Name, it may not work. The certificate will upload to the printer, but the certificate may not be listed in the
Select the Certificatedropdown that is used later in this procedure. Either create a certificate with a Common Name for the initial configuration or perform the initial configuration using this command line tool instead.
- Convert your private key and certificate into the pkcs12 format using OpenSSL:
openssl pkcs12 -export -inkey key.pem -in cert.pem -out printer.p12 - Navigate to
Network > Security > Certificateand clickImport Certificate and Private Key. Upload the p12 file you just generated and click submit. (If your file has a password, ensure you input it in the box.) - Optional but Strongly Recommended: Navigate to
Network > Security > TLS Settingsand set both Server and Client toTLS 1.2. - Navigate to
Network > Network > Protocoland clickHTTP Server Settings. Select your certificate from the dropdown box and click submit. Ensure theActivate other protocols that have secure settings.box is checked and clickYesto load the certificate and reboot the printer.
Note About Install Automation and Securing Credentials
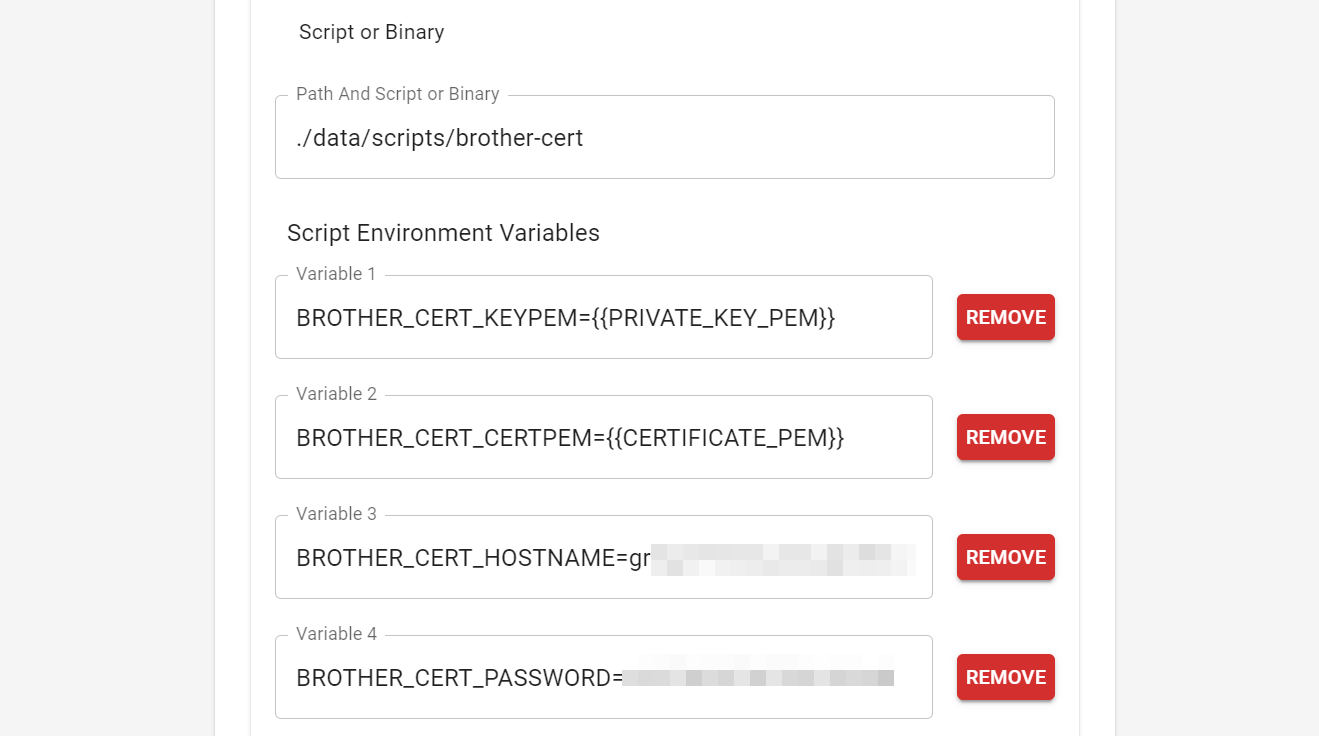
The application supports passing all args instead as environment variables by prefixing the flag name with BROTHER_CERT.
This allows for cloud native uses and also compatibilty with scripting tools that can securely store credentials
in environmental variables.
e.g. BROTHER_CERT_KEYPEM
Required ARGs
BROTHER_CERT_KEYPEM={{PRIVATE_KEY_PEM}}BROTHER_CERT_CERTPEM={{CERTIFICATE_PEM}}BROTHER_CERT_HOSTNAME=printer.example.comBROTHER_CERT_PASSWORD=secret
There are mutually exclusive flags that allow specifying the pem as either filenames or directly as strings. The strings are useful for passing the pem content from another application without having to save the pem files to disk.
Putting all of this together, you can combine the install binary with a tool like Cert Warden (https://www.certwarden.com/) to call the install binary, with environment variables, to directly upload new certificates as they're issued by Cert Warden, without having to write a separate script.
Building
Python3, Go, and git all must be installed to run the build script.
Once the dependencies are installed, clone this repo and run
python build_release.py. If you only want to build for certain OS or
ARCH targets, edit the targets array in the build_release.py file
before running it.